
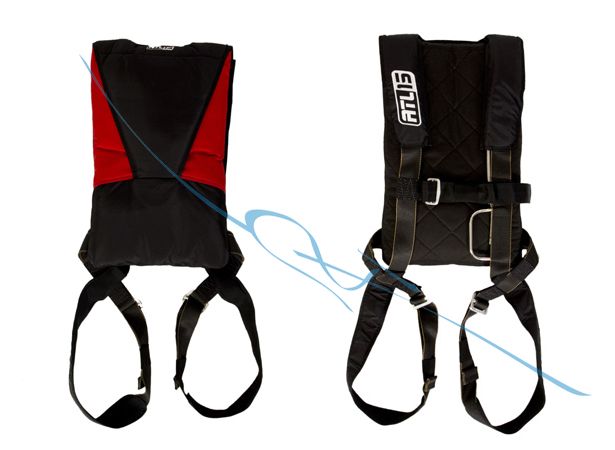
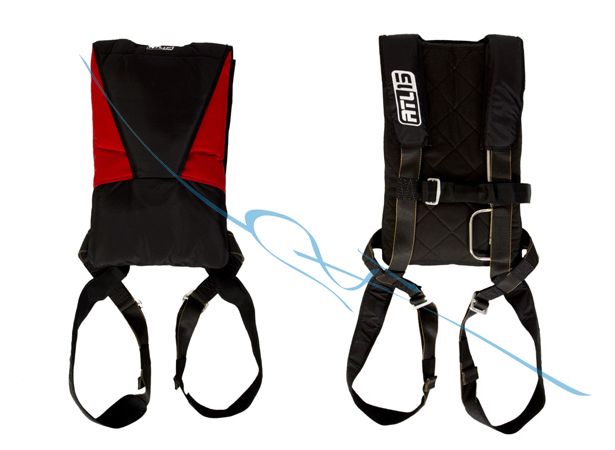
MarS Emergency parachute ATL-15
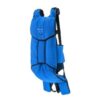
€1,500.00
MarS Emergency Parachute ATL-15
The MarS Emergency Parachute ATL-15 is a compact, back-mounted personal rescue system designed for pilots, crew members and aircraft occupants who may need to evacuate an aircraft during a serious in-flight emergency. Its slim profile makes it suitable for gliders, aerobatic aircraft, experimental aircraft and other cockpits where seat space and freedom of movement are limited.
The system combines a packed emergency canopy, harness, container, suspension lines, deployment handle and associated opening components in one aviation-focused assembly. Unlike a recreational dual-canopy system, it is intended specifically as a final escape option when remaining inside the aircraft is no longer safe.
A correctly adjusted harness helps keep the assembly stable during flight and distributes opening and descent loads across the wearer’s body. The container should sit comfortably behind the pilot without restricting access to flight controls, seat restraints, communication cables or the emergency exit.
The ATL-15 must be matched to the pilot’s complete operating weight and the aircraft’s speed and cockpit configuration. Before use, pilots should practise evacuation, handle location, aircraft-restraint release, canopy deployment and landing preparation under qualified supervision.
Regular inspection and repacking are essential. The canopy, lines, harness, stitching, deployment components and container must be maintained according to the manufacturer’s approved service schedule. Any exposure to moisture, chemicals, excessive heat or physical damage requires professional assessment.
For pilots seeking a certified, wearable emergency escape system with compact dimensions, practical cockpit compatibility and dependable rescue performance, the MarS ATL-15 provides an important final layer of aviation safety.
MarS Emergency Parachute ATL-15 – Compact Back-Type Pilot Rescue System for Aviation Emergencies
MarS Emergency Parachute ATL-15 Overview
Purpose-Built Emergency Parachute for Aircraft Pilots
The MarS Emergency Parachute ATL-15 is a back-mounted personal rescue system designed for pilots, crew members and aircraft occupants who may need to leave an aircraft during a serious in-flight emergency. Unlike a conventional parachute rig used for recreational freefall, this system is intended strictly for emergency evacuation from an aircraft.
The ATL-15 forms part of MarS’s aviation emergency range and holds ETSO approval EASA.210.10057243 Rev. A. The manufacturer lists it as a back-type parachute, while the ATL-15 SL adds a static-line deployment option. Regular inspection and repacking must be completed according to the manufacturer’s instructions and applicable aviation regulations.
This equipment should not be confused with products selected for a parachute jump Australia, Skydive Byron Bay experience or Cairns skydiving course. It serves aircraft escape and pilot-rescue requirements rather than planned sport descents.
Compact Back-Mounted Design
The ATL-15 measures approximately 53 × 33 × 8 centimetres and weighs around 6.8 kilograms. Consequently, it offers a relatively slim profile for installation behind a seated pilot. The system may suit gliders, aerobatic aircraft, experimental aircraft and other cockpits where movement space remains limited.
Its canopy area is approximately 36 square metres. The system supports a minimum pilot weight of about 61 kilograms and a maximum operating weight of 122 kilograms. Therefore, any discussion of weight limit skydiving must be separated from the ATL-15’s certified pilot-weight limits. Its operating limits relate to the complete aviation rescue system and must not be replaced by general drop-zone guidance.
Maximum Speed and Minimum Deployment Altitude
The published maximum deployment speed is 278 kilometres per hour, equivalent to 150 knots. The listed minimum opening altitude is 100 metres above ground level under the specified operating conditions. At the maximum operating weight, the published average vertical descent rate is approximately 7.1 metres per second.
These ratings explain why the ATL-15 must be matched carefully to the aircraft’s operating envelope. High skydiving speed, speed sky diving, a recreational tracking jump or freefall technique does not determine suitability. Instead, the pilot must consider aircraft speed, emergency-exit procedures, cockpit configuration and the approved system limitations.
Canopy Construction and Controlled Descent
The large round canopy is intended to generate drag, reduce vertical speed and support survivable emergency descent. Unlike a rectangular sport wing used for advanced canopy flight, its primary purpose is reliable deceleration rather than high-glide performance.
The user should not expect handling comparable with a Safire 3, a competition design from Fluid Wings or another ram-air main canopy. Terms such as landing flight risers, skydiving downsizing chart and smallest canopy belong to sport-canopy selection and should not be applied casually to this emergency system.
Its published descent rate rises with suspended weight. Therefore, correct weight assessment, approved fitting and emergency-landing preparation remain essential.
Harness, Container and Deployment Components
The ATL-15 combines the canopy, harness, packed container, suspension lines, deployment components and manually operated release handle into one aviation rescue assembly. These are important parts of a parachute, although the layout differs from a dual-canopy container skydive system.
A conventional skydiving rig normally carries both a main and reserve canopy. By contrast, the ATL-15 is a single emergency parachute intended to be activated only after leaving an aircraft in distress.
The harness must be fitted securely over the pilot’s clothing without blocking movement or aircraft controls. Any evidence of damaged stitching, contaminated webbing or excessive linewear requires assessment by authorised maintenance personnel.
Inspection, Packing and Skydiving Rigging Clarification
Although the term skydiving rigging is frequently used online, maintenance of this system must follow its aviation-specific technical documentation. Packing should be completed only by personnel who hold the required authorisation for the equipment and jurisdiction.
The listed repack cycle is one year. Nevertheless, exposure to moisture, chemicals, excessive heat or physical damage may require earlier inspection. The manufacturer identifies the ATL family as emergency-use equipment and requires continued maintenance under the applicable instructions.
A protective gear bag skydive product may help during transport, but the packed system must remain dry, clean and protected from crushing loads.
Pilot Helmet and Eye Protection
The emergency parachute does not include head protection. Pilots should select a helmet appropriate for their aircraft and operating environment.
Searches for skydiving helmet, skydive helmets, sky helmet skydiving, sky diving helmet, full face skydiving helmet, skydiving helmet full face, G35 helmet, Cookie G4 helmet and best skydiving helmet generally relate to sport parachuting. These products may not offer the communication, visor, oxygen or impact features required for aviation.
Similarly, skydiving glasses and skydiver goggles may provide eye protection in freefall, but cockpit users must confirm compatibility with their helmet and aircraft equipment. For those asking can you wear glasses while skydiving, prescription eyewear may fit under suitable goggles; however, pilot equipment should be evaluated for cockpit visibility and secure retention.
Hook Knife and Emergency Accessories
A hook blade knife, hook knife skydiving tool or skydive hook knife can be useful in certain entanglement situations when carried by a trained user. However, it does not replace correct aircraft evacuation procedures.
The cutting tool must remain accessible without interfering with the parachute handle, seat belt, radio cable or aircraft controls. Users should receive practical instruction before relying on one during an emergency.
A suitable skydiving equipment list differs from an aviation emergency checklist. Pilot equipment may include a helmet, gloves, flotation device, emergency locator, radio, protective clothing and survival equipment appropriate to the route.
Wingsuit and Freefall Equipment Clarification
The ATL-15 is not intended for wingsuit sport, a vector wingsuit, gliding suit wingsuit, skydiving gliding suit, fly suits or a recreational wingsuit jump.
Searches for wing suits for sale, price of wingsuit, indoor wingsuit or tandem wingsuit describe specialist sport activities. Likewise, a freefly pud handle and skydiving tube relate to sport-rig deployment or freefall accessories and are not core ATL-15 components.
A jumper pilot leaving a disabled aircraft should follow approved emergency procedures rather than sport-freefall techniques.
Base Jumping and Canopy Work Exclusions
The ATL-15 must not be confused with a base canopy. Base jumping, sometimes incorrectly called baseline jumping, involves dedicated fixed-object equipment and specialised training.
It is also unrelated to CRW skydiving, where participants deliberately fly open ram-air canopies near one another. Neither activity establishes appropriate procedures for an aircraft emergency parachute.
CYPRES and Fire-Parachute Search Terms
The phrases fire parachute and cypress fire skydiving may result from confusion involving pyrotechnic rescue systems or the CYPRES automatic activation device used in sport rigs.
The standard ATL-15 is manually deployed after aircraft exit. The ATL-15 SL offers a static-line option, but users must confirm the exact supplied model and approved installation. The system should never be assumed to contain a sport automatic activation device unless this is specifically documented.
Drop Zones and Online Search Phrases
Searches such as Skydive Belize, skydiving Blue Hole Belize, iFLY Colorado Springs, new skydive, #skydiving latest, nude parachute jump and skydiving nude concern destinations, facilities or entertainment content rather than aviation rescue equipment.
A trustworthy skydiving website may explain parachute principles, although the ATL-15 should be purchased and maintained through an aviation-safety supplier familiar with its certification and service requirements.
Why Choose the MarS ATL-15?
The ATL-15 offers a compact profile, broad pilot-weight range and certified emergency performance for aircraft occupants who need a wearable personal escape system. Its 36 m² canopy, 150-knot operating-speed rating, 100-metre listed minimum deployment altitude and annual repack schedule provide clear technical parameters for aircraft operators.
Most importantly, it is designed for emergency use only. When the correct model is selected, the harness is fitted properly, the system remains within its service schedule and the pilot receives appropriate evacuation training, the ATL-15 provides a serious final layer of protection when remaining inside the aircraft is no longer the safer option.
Construction, Deployment, Pilot Fit and Emergency Use
Back-Mounted Rescue Configuration
The system uses a back-mounted layout so it can remain behind the pilot during normal aircraft operation. This arrangement is especially practical in cockpits where seat depth, control movement and shoulder clearance are limited.
Because the packed assembly sits directly behind the torso, correct seating geometry matters. The pilot should be able to reach primary flight controls, emergency controls and the cockpit release mechanism without the container forcing the upper body forward.
Before operational use, the complete setup should be evaluated inside the actual aircraft. A parachute that fits comfortably while standing may create pressure points or restrict movement once the pilot is seated and secured.
Harness Fit and Adjustment
The harness transfers opening and descent loads to the wearer. Therefore, it must fit closely enough to remain stable without restricting breathing or movement.
Shoulder straps should lie flat and remain free from twists. The leg straps should sit high around the upper thighs and should not hang loosely. Meanwhile, the chest area should remain secure without creating excessive pressure.
Adjustment should be completed while the pilot is wearing normal flight clothing. Thick jackets, survival suits and seasonal layers can change the required harness setting considerably.
Once adjusted, all hardware should be checked for correct routing and positive engagement. Loose webbing ends must also be secured so they cannot interfere with cockpit controls.
Compatibility with the Aircraft Seat
The parachute and seat should be considered as one operating arrangement. Seat shape, padding thickness, headrest position and cockpit width can all affect comfort and emergency access.
A very soft seat may allow the packed container to sink backward, changing the pilot’s posture. Conversely, a rigid seatback may create concentrated pressure during long flights.
The aircraft operator should confirm that the assembly does not interfere with harnesses, lap belts, shoulder restraints or canopy-latching systems. Emergency evacuation should also be practised on the ground.
A suitable installation allows the pilot to exit without the container catching on the cockpit edge, seat frame or structural fittings.
Manual Deployment Sequence
The standard configuration is intended to be activated manually after the wearer has cleared the aircraft.
During an emergency, the pilot must first leave the aircraft safely and create enough separation from the structure. The deployment handle is then pulled according to the approved procedure.
The handle initiates the opening sequence, allowing the pilot chute to extract the packed canopy from the container. Suspension lines extend before the canopy inflates and begins supporting the wearer.
The exact sequence should be learned through practical instruction. Written descriptions alone cannot prepare a pilot for the physical stress, noise and disorientation of an actual escape.
Static-Line Variant Considerations
A static-line version may be selected for certain operations where automatic deployment after aircraft exit is preferred.
The line is connected to an approved attachment point inside the aircraft. As the pilot moves away, the line initiates the deployment sequence.
This configuration requires careful aircraft-specific planning. The attachment point must withstand the expected load, and the line must be routed so it cannot snag controls or wrap around the wearer.
The aircraft owner, equipment supplier and qualified maintenance personnel should approve the installation before use. Improvised attachment points must never be used.
Canopy Inflation
Once extracted, the canopy opens as airflow enters and spreads the fabric. The suspension lines transmit the load from the inflated canopy to the harness.
Inflation may feel abrupt, especially when deployment occurs at higher speed. Proper body position and a correctly fitted harness help distribute the opening force.
The wearer should avoid wrapping arms or equipment around the suspension lines. Loose cockpit items should also be secured before flight because they may create entanglement hazards during evacuation.
After inflation, the pilot should assess the canopy and prepare for landing.
Descent Characteristics
The canopy is designed to reduce vertical speed and provide a survivable emergency descent rather than high-efficiency forward flight.
Its movement may be influenced by suspended weight, wind, altitude and atmospheric conditions. A heavier wearer may experience a faster descent than a lighter one.
The pilot should identify a landing area as early as possible. Open ground is preferable, although emergency conditions may limit the available choices.
Unnecessary movements should be avoided because the system is not intended for aggressive manoeuvring.
Landing Preparation
The wearer should observe the ground, wind direction and major obstacles during descent. Power lines, roads, buildings, trees and water should be identified as early as possible.
A stable body position helps prepare the legs and torso for impact. The knees should remain slightly bent rather than locked.
A parachute landing fall may reduce injury by distributing impact across several parts of the body. This technique should be practised under qualified supervision before the system is needed.
Attempting to land stiff-legged can increase the risk of ankle, knee or spinal injury.
Strong-Wind Landings
Wind can create additional hazards after touchdown. The inflated canopy may drag the wearer across the ground or pull them toward obstacles.
The pilot should follow the post-landing procedure taught during emergency training. Reducing canopy inflation quickly may become necessary.
Protective gloves and sturdy footwear can improve safety during rough terrain or dragging.
If the wearer is injured, sudden movement should be avoided unless remaining in position creates greater danger.
Water-Landing Preparation
Flights over water may require flotation equipment and additional survival planning.
A water landing can create entanglement risks involving the harness, lines and canopy fabric. Therefore, pilots operating near large bodies of water should receive dedicated training.
The wearer should understand when to inflate flotation equipment and how to manage harness release after entering the water.
After any immersion, the complete assembly must be removed from service and inspected. Salt water, moisture and contamination can damage textile and metal components.
Inspection Before Flight
A brief but systematic inspection should be completed before each flight.
Check the container, harness webbing, adjustment hardware, deployment handle and visible stitching. The packed assembly should appear secure, dry and free from contamination.
The service label and repack date must remain current. Any unexplained damage, broken seal or loose component requires professional assessment.
The pilot should also confirm that the handle remains reachable while seated and restrained.
Repacking and Maintenance
The system must be repacked at the required interval even when it has not been deployed.
During servicing, authorised personnel inspect the canopy fabric, lines, harness, container, pilot chute and deployment components. The assembly is then repacked according to the approved procedure.
Exposure to moisture, chemicals, excessive heat or physical impact may require inspection before the normal service date.
Maintenance records should follow the equipment throughout its operating life.
Storage Conditions
The packed parachute should be stored in a dry, temperature-controlled environment away from direct sunlight.
Fuel, oil, solvents and battery chemicals can damage structural materials. Therefore, the equipment should not be placed on contaminated workshop floors or beside aircraft-maintenance chemicals.
Heavy objects should never be stacked on top of the container. Compression or sharp edges may damage internal components.
If the system becomes damp, it should be assessed and dried under professional guidance before being returned to service.
Practical Emergency Readiness
Owning an emergency parachute is only one part of pilot survival preparation. The wearer must also understand aircraft evacuation, handle operation, body position, landing technique and post-landing survival priorities.
Ground practice should be repeated whenever the aircraft, seat, clothing or equipment configuration changes.
When the harness is fitted correctly, the aircraft installation is verified, the system remains within its maintenance schedule and the pilot has completed practical training, the equipment can provide a critical final escape option during an otherwise unsurvivable aviation emergency.
Emergency Decision-Making, Exit Preparation, Landing Hazards and Long-Term Reliability
Recognising When Evacuation Becomes Necessary
An emergency parachute is only useful when the pilot recognises that remaining inside the aircraft has become more dangerous than leaving it. This decision may arise after structural failure, uncontrollable fire, loss of critical flight control, unrecoverable spin conditions or another event that makes a safe landing unlikely.
The decision must be based on aircraft type, altitude, speed, terrain and the emergency procedures established for that operation. Delaying too long can reduce the height available for deployment and canopy inflation. However, leaving prematurely may expose the pilot to hazards that could have been avoided.
For this reason, aircraft-specific emergency training should define clear decision points. These procedures should be reviewed before flight, especially when operating aerobatic, experimental or high-performance aircraft.
Maintaining Control Before Exit
If time and aircraft condition permit, the pilot should reduce speed, establish the safest possible attitude and move toward an area that offers better separation from the aircraft after exit.
This preparation may reduce the chance of striking the tail, wing, propeller or another structure. Nevertheless, control may not always be possible during a severe emergency.
The pilot should avoid becoming so focused on stabilising the aircraft that the opportunity to escape is lost. A practical balance must be maintained between improving exit conditions and preserving enough altitude for deployment.
Every action should follow approved training rather than improvised assumptions made under pressure.
Disconnecting Cockpit Equipment
Before leaving the aircraft, the pilot may need to disconnect communication cables, oxygen lines, restraint systems or other equipment.
These items can become serious entanglement hazards if they remain attached during exit. Therefore, their release mechanisms should be easy to identify and operate with gloves.
Cockpit preparation should include securing loose objects, maps, electronic devices and tools. During an abrupt evacuation, unsecured items may strike the pilot or interfere with the parachute system.
Ground practice is important because emergency controls can feel different when the pilot is seated, restrained and wearing full flight equipment.
Releasing the Aircraft Restraint
The aircraft seat restraint and the rescue harness serve different functions. The seat belt holds the pilot inside the cockpit during normal flight, while the rescue harness supports the wearer after deployment.
During evacuation, the aircraft restraint must be released without opening or loosening the rescue harness.
The pilot should practise locating the correct buckle by touch. Confusion between different straps or fittings can delay the exit.
Any restraint design that becomes difficult to release under load should be assessed before flight. The pilot must be able to free the body without becoming trapped between the seat and cockpit structure.
Clearing the Aircraft Structure
Once outside, the pilot must create enough separation from the aircraft before initiating deployment. The correct delay depends on altitude, aircraft speed, body position and the specific emergency procedure.
Opening too close to the aircraft may increase the risk of canopy or line contact with the structure. Waiting too long, however, can reduce the available height below safe limits.
A stable body position may support a cleaner deployment, but a perfect position may not be possible. The system is intended for emergencies where the wearer could be tumbling or disoriented.
The pilot should therefore prioritise clear separation and timely activation rather than attempting to achieve an ideal freefall posture.
Locating and Pulling the Handle
The deployment handle should be checked for accessibility during every preflight fitting. Its position must remain consistent and unobstructed by clothing, seat belts or survival equipment.
During activation, the pilot should establish a firm grip and pull through the full required travel. A weak or partial movement may not complete the deployment sequence.
Handle practice should be conducted while wearing normal flight clothing. Heavy jackets, gloves or flotation equipment can affect reach and grip.
The pilot should never assume that simply touching the handle is enough. Positive identification and decisive movement are essential.
Managing the Opening Shock
Canopy inflation may create a sudden force through the harness, especially when deployment occurs at higher speed.
A properly adjusted harness distributes the load across the shoulders, torso and upper legs. Loose straps may allow greater body movement and increase discomfort or injury risk.
The wearer should avoid holding rigid objects close to the face during deployment. Arms should remain positioned according to training so they do not become trapped by webbing or lines.
After inflation, the pilot should quickly assess personal condition, canopy status and surrounding hazards.
Assessing the Canopy After Opening
The first priority after deployment is confirming that the canopy is fully inflated and supporting the wearer.
The pilot should look for major damage, twisted lines or unusual descent behaviour. However, the system is not intended to provide the same level of steering or correction capability as a sport parachute.
Unnecessary manipulation should be avoided. The pilot should instead concentrate on maintaining a stable body position and identifying the safest available landing area.
Wind drift may determine where the system travels, so terrain assessment should begin immediately.
Selecting the Best Landing Area
The preferred landing area is open, level ground free from major obstacles. In an actual emergency, such an area may not be available.
The pilot should compare fields, roads, wooded areas, water, buildings and steep terrain. Power lines are especially difficult to see and should be treated as a major hazard.
A large imperfect area is often safer than a smaller clear space that requires last-second movement or uncertain control.
Once the likely landing zone has been identified, the pilot should prepare physically rather than continue searching for a perfect option.
Preparing for Ground Impact
The body should be prepared to absorb landing forces through a controlled fall rather than a stiff-legged impact.
Feet and knees should remain together, with the knees slightly bent. The muscles should stay firm without locking the joints.
A trained rolling technique can distribute impact across the lower legs, thigh, hip and shoulder. This reduces the chance that all force will be concentrated in the ankles or spine.
Practical training is important because correct body position becomes difficult to improvise during a stressful descent.
Tree and Rough-Terrain Landings
When trees cannot be avoided, the pilot should protect the face, keep the legs together and prepare for branches or suspended landing.
After contact, the wearer should assess whether the harness remains supported. Attempting to climb down without suitable equipment may create a dangerous fall skydiving tube.
Rocky, uneven or sloped terrain can increase injury risk. Sturdy footwear and protective clothing may provide valuable protection.
Emergency communication equipment should remain attached securely so it can be used after landing.
Post-Landing Actions
After touchdown, the pilot should reduce the risk of being dragged by the inflated canopy. The correct method should follow the training provided for the system.
Personal injuries should be assessed before unnecessary movement. However, immediate relocation may be required if there is fire, traffic, rising water or another continuing hazard.
The pilot should activate emergency communication or location equipment as soon as practical. Remaining visible and conserving energy can improve rescue prospects.
The parachute should not be repacked or returned to use after deployment without a complete professional inspection.
Service Records and Operational Readiness
Long-term reliability depends on scheduled repacking, controlled storage and complete maintenance records.
Every inspection, repair, deployment and repack should be documented. Missing records make it harder to confirm the system’s condition and service status.
The equipment should be removed from operation when contamination, damage or an overdue service interval is discovered.
When maintenance, cockpit compatibility, emergency training and pilot decision-making are managed together, the system can remain a dependable final safety option throughout its approved operating life.
Be the first to review “MarS Emergency parachute ATL-15”
Related products

Reserve Canopy


Reviews
There are no reviews yet.