
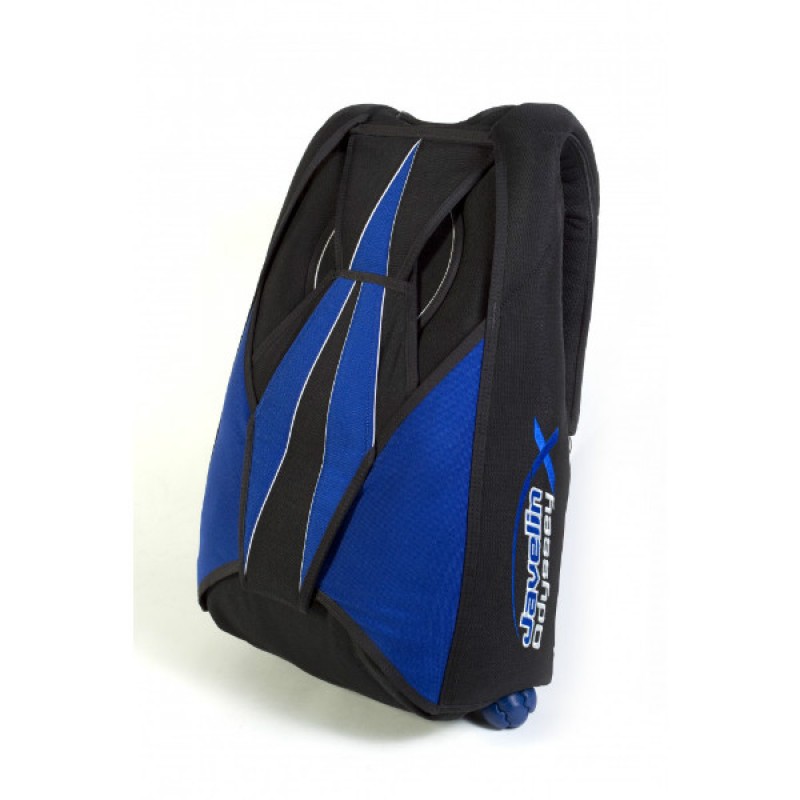
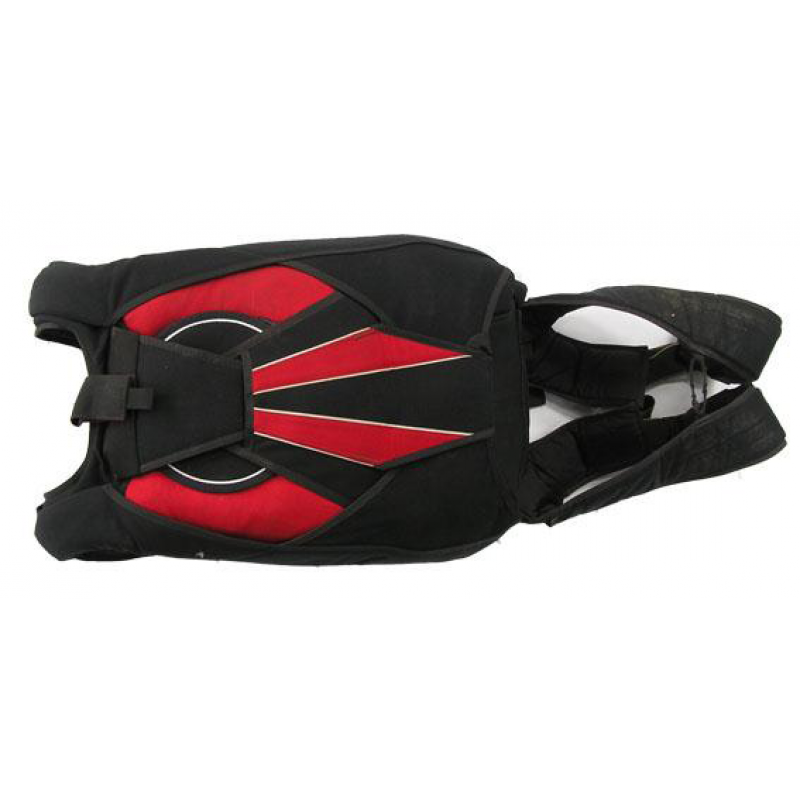
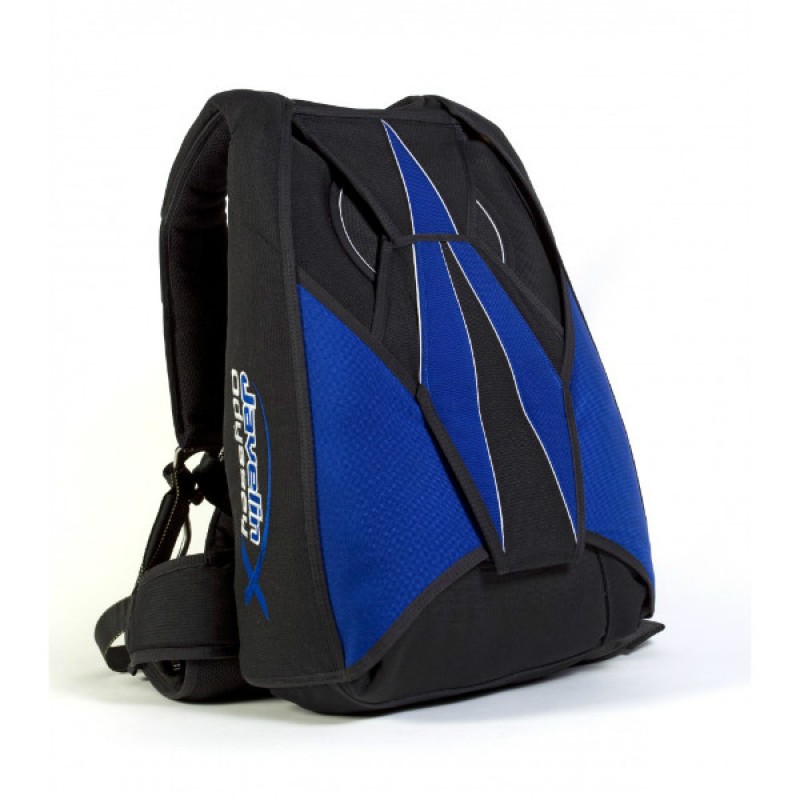
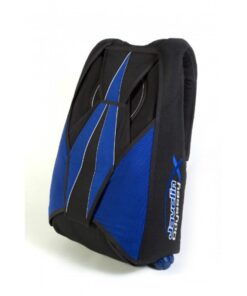
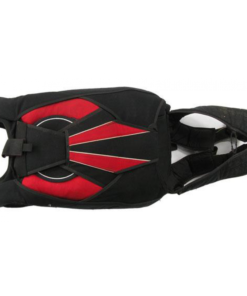
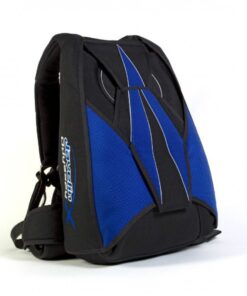
Sun Path Javelin Odyssey Full Rig Package
€6,500.00
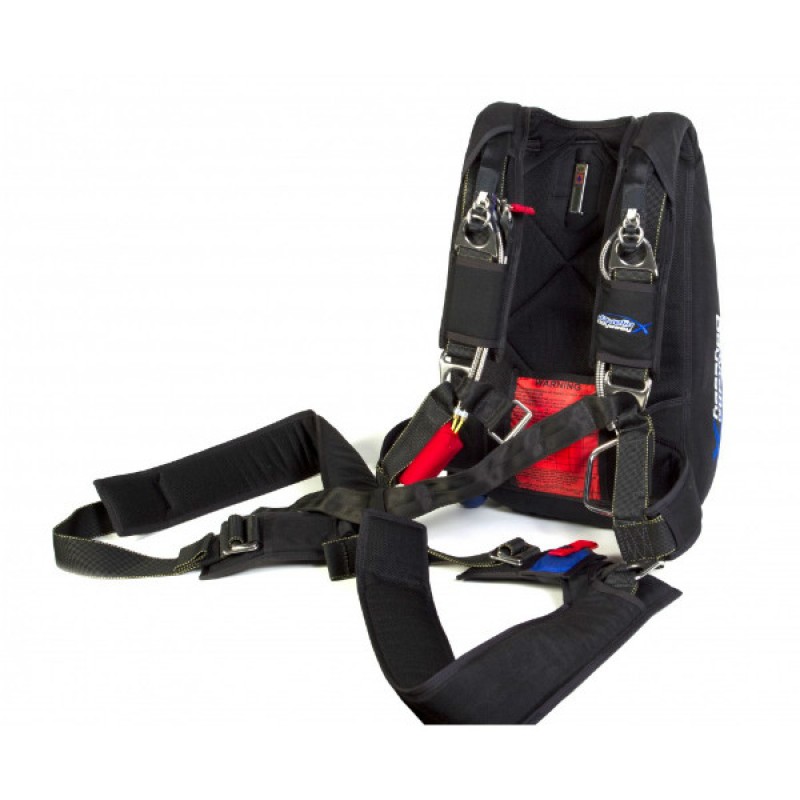
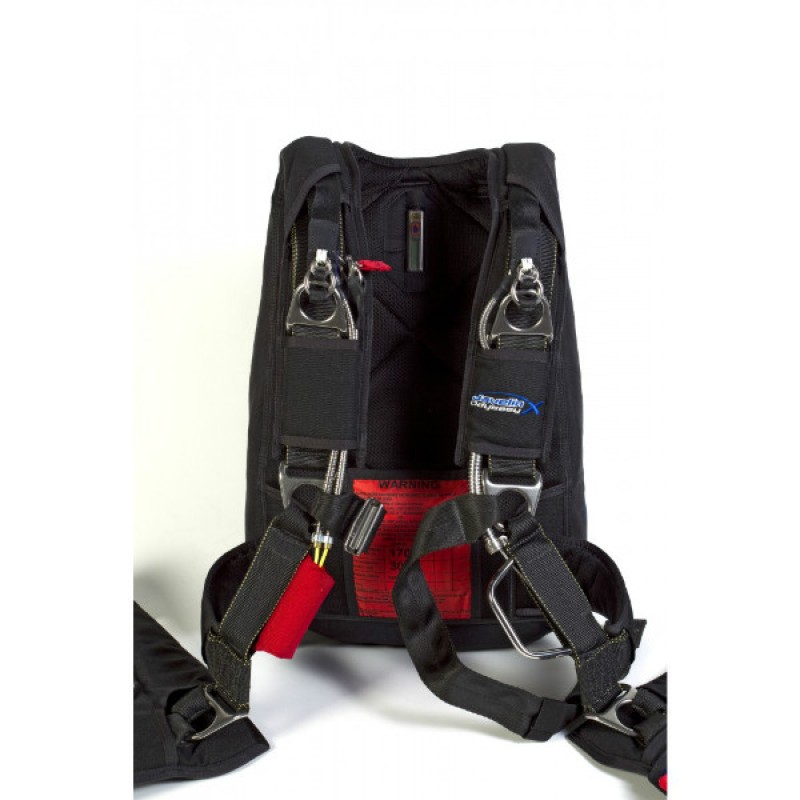
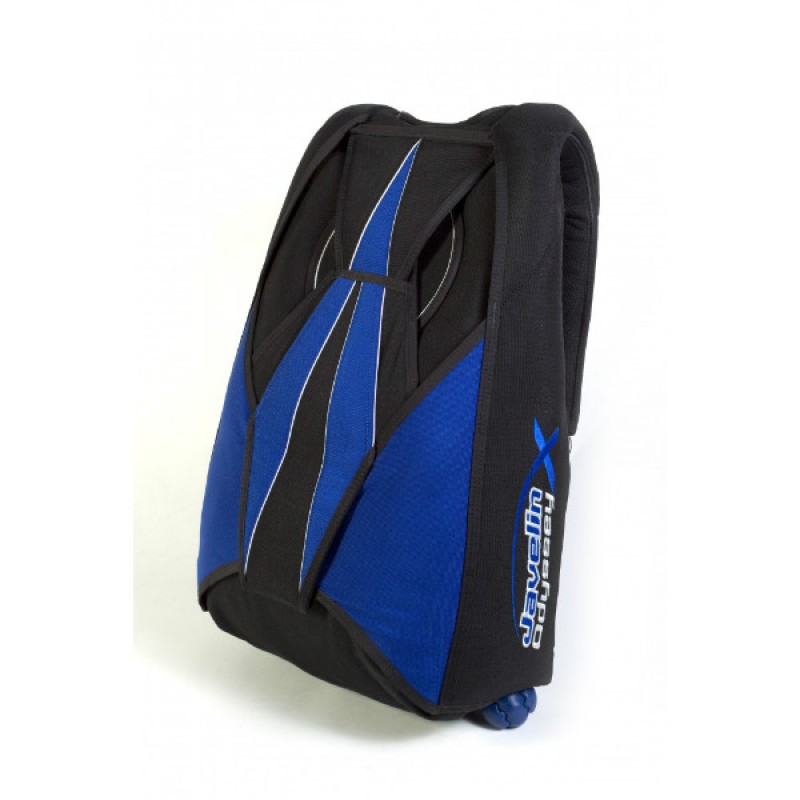
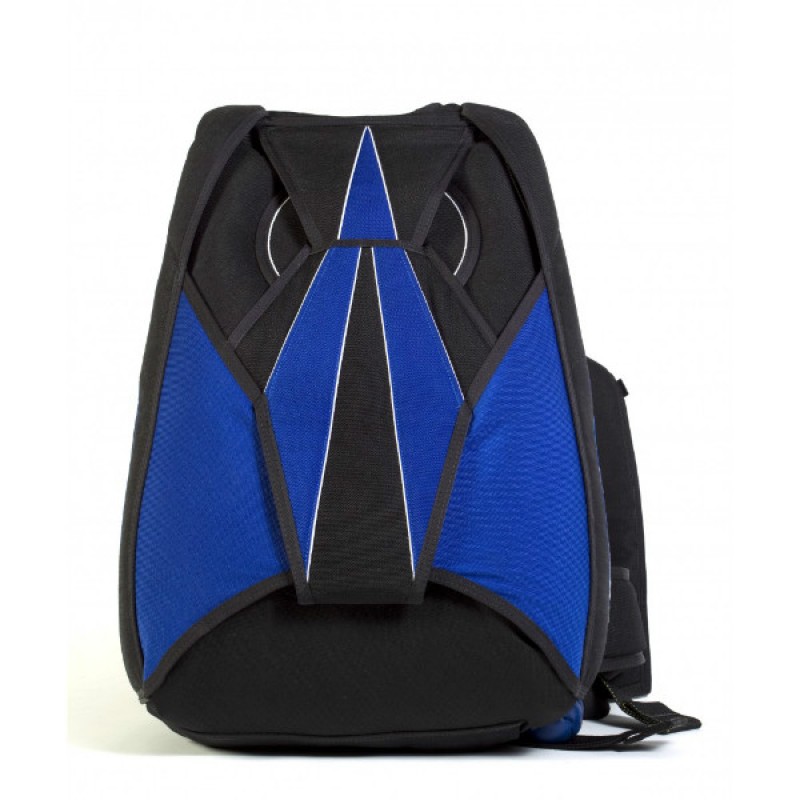
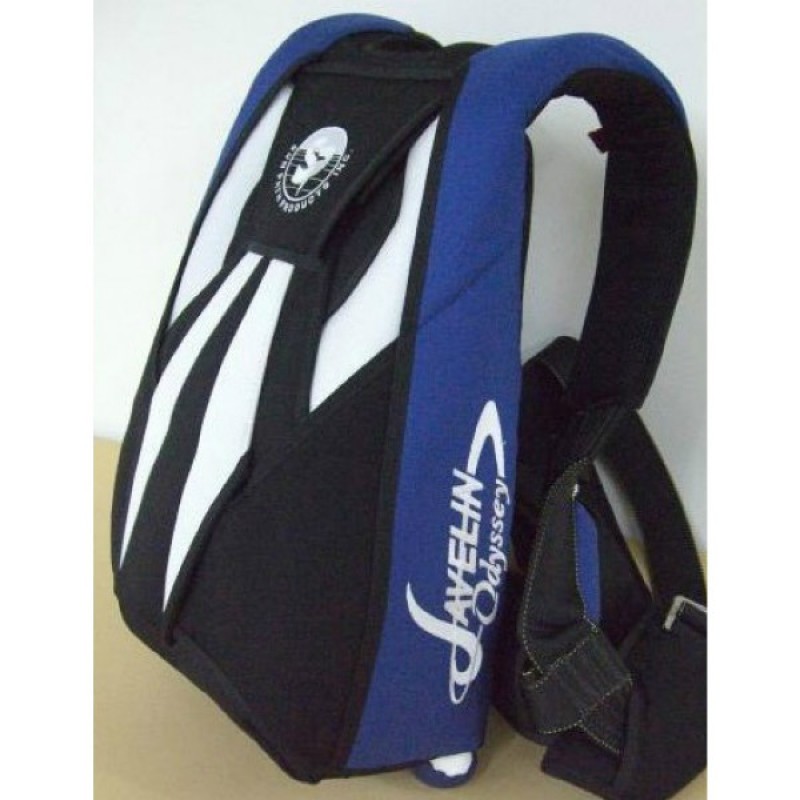
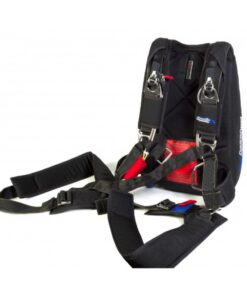
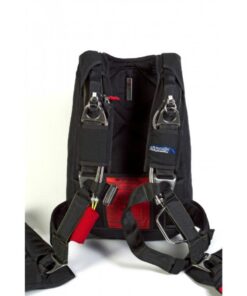
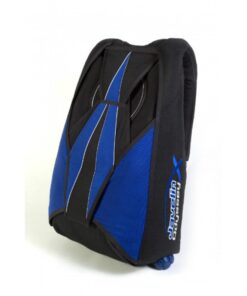
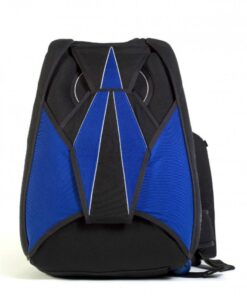
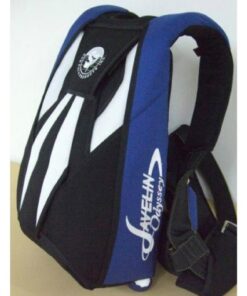
The Sun Path Javelin Odyssey Full Rig Package centers on Sun Path’s flagship sport harness-and-container system. Its standard configuration includes a Type 7 harness, cut-in laterals, stainless-steel hardware, anti-twist main risers, a kill-line pilot chute, a Phat Daddy cutaway handle, a deep reserve-handle pocket, easy-grip control toggles, RSL equipment, AAD-ready construction, and compatibility with the optional SkyHook system. Buyers can also select different back pads, harness articulation, fabrics, handle configurations, and comfort upgrades.
The phrase “full rig package” must be interpreted carefully. Sun Path states that its harness-and-container package normally includes the container, emergency handles, main risers, main deployment bag, pilot chute, reserve freebag, and reserve pilot chute. A main canopy, reserve canopy, automatic activation device, or other accessories should not be assumed to be included unless the seller lists them explicitly.
Sun Path Javelin Odyssey Full Rig Package: Custom-Fit Sport Skydiving System
Understanding the Sun Path Javelin Odyssey Full Rig Package
Parachute Jump Australia, Skydive Byron Bay, and Cairns Skydiving
A parachute jump Australia setup may be used at established locations such as Skydive Byron Bay or facilities offering Cairns skydiving, provided the system complies with local requirements and receives professional inspection. Climate, coastal conditions, aircraft type, landing area, and regional reserve-packing regulations should all be considered before travel.
The Odyssey’s fit should also be verified after international transport. Sun Path emphasizes accurate body measurements rather than approximate sizing because proper harness geometry directly affects comfort, stability, and handle access.
Weight Limit Skydiving and Harness Sizing
A weight limit skydiving assessment includes body weight, clothing, helmet, canopies, container, and carried accessories. The harness must fit the jumper’s body, while the selected main and reserve canopies must remain within the approved container-size range.
The Odyssey uses cut-in laterals, which are sewn inward from the lower corners of the container. This design creates a closer, more customized fit than a broader shared-use harness configuration. Consequently, precise measurements are particularly important.
Parachute Rig and Skydiving Rig Construction
The Javelin Odyssey functions as the structural foundation of a complete parachute rig or skydiving rig. Its Type 7 harness distributes opening and suspended loads through the main lift web, laterals, leg straps, chest strap, and attachment hardware.
The standard stainless-steel hardware resists normal environmental exposure and offers a clean technical finish. Meanwhile, optional hip and chest articulation can increase flexibility and freedom of movement. However, only a properly measured harness can deliver the intended support and handle positioning.
Container Skydive Configuration and Package Contents
A container skydive system houses both the main and reserve deployment assemblies. The standard Sun Path package includes the emergency handles, risers, deployment bag, pilot chute, reserve freebag, and reserve pilot chute. Buyers must confirm separately whether the advertised package also includes compatible canopies and an activation device.
Sun Path warns against installing a main or reserve canopy larger than its sizing chart permits because overstuffing can create serious safety concerns. Custom artwork, Dacron lines, and some canopy materials can also increase actual pack volume.
Parts of a Parachute and Complete-System Integration
The parts of a parachute system include the harness, main container, reserve container, main canopy, reserve canopy, deployment bag, pilot chute, bridle, freebag, risers, suspension lines, handles, closing loops, and optional electronic safety equipment.
Each component must work as part of the complete assembly. A good-looking container does not guarantee proper canopy compatibility, closing pressure, deployment performance, or harness fit. Therefore, a qualified rigger should verify the entire package before it enters service.
Skydiving Rigging and Professional Assembly
Professional skydiving rigging remains essential when assembling a new or used Odyssey package. The rigger should check canopy compatibility, riser installation, reserve packing, loop condition, handle seating, pilot-chute configuration, RSL routing, and electronic-device installation.
Buyers should also review Sun Path’s current service bulletins and compare them with the system’s serial number and manufacturing date. Certain older production groups have required specific inspections, so complete records matter when evaluating pre-owned equipment.
RSL and SkyHook Reserve Options
The Odyssey comes RSL-equipped and supports the optional SkyHook system. Sun Path explains that the Odyssey RSL connects to the right main riser and incorporates a Collins Lanyard configuration. SkyHook compatibility has been built into Javelin Odyssey systems manufactured since February 2007, although installation and configuration must still be confirmed professionally.
The system remains a backup rather than a replacement for correct emergency procedures. A jumper must still identify malfunctions, make timely decisions, and execute trained actions.
Freefly Pud Handle and Deployment Choices
A freefly pud handle may be chosen for users who prefer a low-profile deployment handle suited to freefly environments. Other pilot-chute handle configurations may also be available.
The deployment handle should remain secure during movement but immediately accessible during use. Handle style, bridle length, pilot-chute size, and bottom-of-container placement must match the approved system configuration.
Tracking Jump and High-Speed Body Flight
During a tracking jump, stable container geometry and secure flap design help keep deployment components protected. Nevertheless, the rig cannot correct poor separation, unstable deployment, or inadequate altitude awareness.
The same principle applies to skydiving speed and speed sky diving disciplines. Higher airspeeds increase the importance of body position, deployment timing, secure handles, correctly maintained closing systems, and suitable equipment configuration.
Wingsuit Sport and Wingsuit Equipment
The wingsuit sport places specialized demands on a harness-and-container system. A vector wingsuit, gliding suit wingsuit, conventional wingsuit, or another skydiving gliding suit may influence access to handles, deployment airflow, pilot-chute extraction, and canopy choice.
Searches for wing suits for sale, price of wingsuit, fly suits, or a supposed tandem wingsuit should not replace qualified instruction and compatibility checks. Likewise, training in an indoor wingsuit facility does not automatically establish readiness for aircraft-based flight.
Skydiving Helmet and Visibility Equipment
A skydiving helmet, sky diving helmet, or sky helmet skydiving model should integrate comfortably with the Odyssey without interfering with emergency-handle access or head movement.
Common options include skydive helmets, a full face skydiving helmet, G35 helmet, Cookie G4 helmet, or another skydiving helmet full face design. The best skydiving helmet depends on fit, field of view, discipline, ventilation, and communication requirements.
A jumper asking can you wear glasses while skydiving may use properly secured skydiving glasses or skydiver goggles, subject to instructor and helmet-fit guidance.
Hook Blade Knife and Emergency Cutting Tools
A hook blade knife, hook knife skydiving tool, or skydive hook knife may be mounted in an approved accessible location. It remains separate from the rig’s cutaway and reserve-deployment systems.
Sun Path’s configuration tools include optional hook-knife placement choices, but location should support access without creating snag or interference hazards.
Linewear and Routine Inspection
Regular inspection for linewear helps preserve predictable canopy performance. Owners should monitor suspension lines, steering lines, risers, connector links, deployment components, stitching, webbing, hardware, and closing loops.
The anti-twist main risers supplied with the Odyssey support organized riser geometry, although they do not eliminate the possibility of line twists. Sun Path notes that Type 17 risers are common for sport systems, while Type 8 risers are recommended for J5K containers and larger.
Skydiving Downsizing Chart and Smallest Canopy Decisions
A skydiving downsizing chart may provide general guidance, but it cannot determine the correct canopy for every pilot. The smallest canopy that physically fits inside the container may still be inappropriate for the user’s training, loading, currency, or landing ability.
Sun Path also advises against installing canopies larger than the approved chart allows. Therefore, both pilot suitability and physical pack-volume compatibility must be evaluated.
Canopy Flight, Landing Flight Risers, and Main Canopy Selection
During canopy flight, the harness should provide balanced support while keeping the controls accessible. The repeated search phrase landing flight risers may refer to riser-based control, but high-performance inputs require specific coaching and adequate altitude.
Canopies such as the Safire 3 or products manufactured by Fluid Wings may be considered for a package only after the exact size, material, line type, pack volume, and pilot suitability have been confirmed.
Base Jumping, Baseline Jumping, and Base Canopy Use
Base jumping, sometimes mistakenly described as baseline jumping, uses systems and procedures that differ from conventional dual-parachute skydiving equipment. A base canopy should not be installed in the Odyssey merely because its nominal area appears to fit.
The Javelin Odyssey is a sport skydiving harness-and-container system and should only be configured within approved applications.
CRW Skydiving and Jumper Pilot Considerations
For CRW skydiving, a qualified jumper pilot must consider canopy type, riser configuration, emergency tools, deployment procedures, and discipline-specific hazards.
The Odyssey can form part of a professionally configured system, but the container alone does not establish suitability for canopy formations or specialized contact flight.
Fire Parachute and CYPRES Fire Skydiving Searches
The phrases fire parachute and cypress fire skydiving may refer to activation-device discussions. The Odyssey is AAD-ready, but the electronic unit, cutter, control head, reserve loop, and installation must be compatible and professionally fitted.
An activation device does not replace timely deployment or emergency procedures.
Gear Bag Skydive and Skydiving Equipment List
A complete gear bag skydive setup may include the assembled rig, helmet, visual and audible altimeters, goggles, jumpsuit, logbook, hook knife, tools, and protective storage equipment.
Any skydiving equipment list should distinguish between components included with the container and accessories purchased separately. Buyers should request a written inventory rather than assuming that “full rig” means every item is supplied.
Travel, Training, and Unrelated Search Topics
Locations such as Skydive Belize, skydiving Blue Hole Belize, and iFly Colorado Springs represent destination or training searches rather than Odyssey features. Likewise, skydiving tube, new skydive, #skydiving latest, and a general skydiving website do not establish product compatibility.
Terms such as nude parachute jump and skydiving nude are unrelated to the system’s engineering. The package should be evaluated through verified specifications, accurate measurements, complete service records, professional inspection, and appropriate training.
Harness Design, Container Function, Fit, Deployment, and Maintenance
Custom-Fitted Harness Construction
The harness forms the structural foundation of the complete system. It supports the jumper during aircraft exit, freefall, opening, suspended flight, and landing. Because the harness carries substantial loads, accurate measurements are essential.
A properly fitted harness should hold the container securely against the back without causing excessive pressure, restricted movement, or difficult handle access. The main lift web, laterals, leg straps, and chest strap must work together to distribute forces across the body.
Poor fit can create several problems. A harness that is too large may shift during movement, while one that is too small may cause discomfort and restrict mobility. Therefore, buyers should provide precise measurements and avoid selecting a system based only on height or body weight.
Professional fitting becomes especially important when purchasing used equipment. Even when the container size appears suitable, the harness may have been built for a different body shape.
Cut-In Laterals and Body Stability
The cut-in lateral design helps the container sit closer to the user’s lower back. Instead of attaching at the outermost corners, the laterals are positioned inward to create a more contoured fit.
This configuration may improve stability during movement because the container remains closer to the body. It can also reduce unnecessary side-to-side motion when the harness has been measured and adjusted correctly.
However, the design requires accurate sizing. A poorly matched lateral length may affect comfort, symmetry, and emergency-handle positioning.
The owner should inspect the lateral webbing regularly for abrasion, broken stitching, contamination, or distortion.
Leg-Strap Comfort and Security
Leg straps secure the lower section of the harness around the thighs. They must remain tight enough to prevent unwanted movement while still allowing normal circulation and mobility.
Before boarding the aircraft, both straps should be checked for correct routing, adjustment, and hardware engagement. Twisted webbing should be corrected immediately.
During inspection, the user should look for:
- Frayed webbing
- Damaged stitching
- Bent hardware
- Contamination
- Uneven adjustment
- Loose excess webbing
- Signs of heat or chemical exposure
Any questionable condition should be evaluated by a qualified technician.
Chest-Strap Adjustment
The chest strap stabilizes the upper harness and helps maintain shoulder positioning. It should be adjusted according to the manufacturer’s guidance and the user’s training.
An excessively loose strap may allow unwanted movement, while an overly tight strap may restrict breathing and upper-body mobility.
The strap should pass through the hardware correctly and remain free from twists. Excess material should be secured so it cannot flap or interfere with other components.
After opening, some experienced users may adjust the chest strap for comfort or mobility. However, this should only be done according to training and local procedures.
Container Shape and Load Distribution
The container houses the main and reserve deployment systems in separate compartments. Its shape is intended to maintain a secure profile while supporting orderly deployment.
When properly packed, the system should maintain balanced closing tension. Uneven pressure, distorted flaps, visible gaps, or an unusually rigid profile may indicate incorrect pack volume or assembly.
A container should never be forced closed around unsuitable equipment. Excessive pressure may damage fabric, grommets, closing loops, or internal components.
Likewise, an underfilled compartment may allow movement that affects closing security. Correct component sizing and professional assembly are therefore essential.
Main Deployment System
The main deployment system typically includes a pilot chute, deployment handle, bridle, deployment bag, closing loop, risers, and canopy.
When the user extracts and releases the pilot chute, airflow creates drag. The bridle then pulls the closing pin, opens the container, and extracts the deployment bag.
The lines extend before the canopy leaves the bag and begins inflation. Each stage must occur in the correct sequence.
Reliable deployment depends on:
- Correct packing
- Suitable pilot-chute size
- Proper bridle routing
- Secure handle placement
- Compatible bag dimensions
- Serviceable closing components
- Stable body position
No single component can compensate for an incorrectly assembled system.
Deployment Handle Options
Different handle styles may be available depending on the user’s discipline and preference. Each option should remain secure during movement while still allowing a firm and immediate grip.
The handle must be checked before every jump. It should sit fully in its pocket and should not be obstructed by clothing or other equipment.
A loose handle may become exposed prematurely, while an excessively tight pocket may make extraction difficult.
Any change in handle type or pocket condition should be reviewed professionally.
Reserve Compartment Function
The reserve compartment contains the reserve canopy, freebag, pilot chute, closing loop, and associated hardware.
Unlike the main system, the reserve must be packed and sealed by an appropriately authorized professional. The closing sequence, pilot-chute compression, loop length, and component placement must follow approved procedures.
The compartment should not be opened casually. Unauthorized handling may disturb the pack job or invalidate the inspection seal.
Owners should monitor the scheduled repack date and comply with the legal requirements applicable in their jurisdiction.
Emergency Handle Placement
Emergency handles must remain visible, secure, and accessible. Their location depends on the harness fit and system design.
The user should touch and identify each handle during every gear check. This reinforces muscle memory and confirms that clothing, accessories, or harness adjustments have not obstructed access.
Loose handles, damaged pockets, deformed housings, or unusual resistance should be inspected before use.
The user should never assume that a handle is correctly positioned simply because it appears normal from the front.
Riser Design and Inspection
The risers connect the main canopy to the harness. They carry opening and suspended loads while also supporting steering and release components.
Before use, the risers should be inspected for:
- Webbing damage
- Broken stitching
- Twists
- Hardware deformation
- Contamination
- Worn control components
- Incorrect routing
- Uneven length
The release system must be assembled exactly as approved. Incorrect cable routing, dirty housings, or damaged locking components may interfere with emergency operation.
Automatic Reserve-Deployment Connections
A reserve-assistance connection may be installed to support reserve deployment after a main-canopy release. However, it remains a backup feature.
Its routing should be checked carefully because incorrect assembly may affect operation. The connection should not be twisted, trapped, or attached to the wrong location.
Users must understand how the system behaves during different malfunction scenarios. Training should cover both the benefits and limitations of the installed configuration.
Electronic Safety-System Compatibility
The container may be prepared for an electronic activation device. Installation normally involves a processing unit, control display, cutting component, and approved cable routing.
The equipment must match the container configuration and reserve closing system. Improvised installation is unacceptable.
After installation, the technician should confirm that:
- The cutting component is positioned correctly
- The reserve loop passes through the opening
- The cables follow approved channels
- The display remains accessible
- The processing unit is secure
- The system completes its normal self-test
The electronic system should be treated as a final backup rather than a substitute for timely action.
Main and Reserve Size Compatibility
Both canopy compartments are designed for specific pack-volume ranges. Nominal square footage alone does not determine compatibility.
Fabric type, age, line material, construction method, reinforcement, and packing technique can change actual volume.
A canopy that technically shares the same size marking as another model may still pack differently. Therefore, the manufacturer’s compatibility information and professional judgment should be used together.
Overfilling or underfilling either compartment may affect container shape, closing pressure, and deployment behavior.
Pre-Jump Equipment Check
A systematic inspection should be completed before every jump.
The user should confirm:
- Leg straps are correctly routed
- The chest strap is secured
- Emergency handles are seated
- The deployment handle is secure
- Closing pins are positioned correctly
- Flaps are closed properly
- Risers are covered
- Electronic equipment is active
- No cable or webbing is exposed abnormally
A second-person check may identify problems that the wearer cannot easily see.
Cleaning and Storage
The system should be kept clean, dry, and protected from direct sunlight.
Strong chemicals, fuel, oil, bleach, solvents, and excessive heat may weaken webbing, fabric, stitching, or coatings.
When the equipment becomes wet, it should be dried naturally in a shaded and ventilated area. Direct heat should not be used.
Long-term storage should take place in a cool environment where the system cannot be crushed, contaminated, or accessed by unauthorized individuals.
Inspection and Repair
Routine visual checks should be combined with scheduled professional inspections.
Wear may develop gradually around high-load areas, hardware contact points, pockets, flaps, webbing junctions, and closing components.
Repairs should use approved materials and methods. Household sewing, adhesive patches, altered hardware, and improvised replacements should never be applied.
Detailed service records should document inspections, modifications, repairs, reserve packing, component changes, and unusual events.
Long-Term Ownership
A complete system requires ongoing responsibility. Proper fit, compatible components, professional assembly, regular maintenance, accurate records, and disciplined use all contribute to reliability.
The equipment should be reassessed whenever the owner changes body size, flight discipline, canopy type, or operating environment.
Ultimately, dependable performance comes from combining suitable equipment with current training, careful preparation, conservative decision-making, and qualified technical support.
Daily Operation, Comfort, Safety Checks, and Long-Term Reliability
Preparing the System Before Each Jump
A complete pre-use inspection should be performed before the equipment is worn. The owner should examine the harness, container flaps, deployment handle, emergency handles, risers, closing pins, pilot chute, and visible stitching.
The system should appear balanced and correctly packed. Bulging compartments, loose flaps, exposed cables, damaged webbing, or unusual closing pressure may indicate a problem that requires professional attention.
The user should also confirm that the reserve inspection remains valid and that any installed electronic safety equipment completes its normal startup sequence.
Putting On the Harness Correctly
The system should be lifted and handled carefully rather than dragged across the floor. Each leg should pass through the correct opening before the shoulder straps are positioned.
Both leg straps should then be tightened evenly. Uneven adjustment may allow the harness to shift during movement or opening.
The chest strap should be routed correctly through its hardware and adjusted securely. Excess webbing should be retained so that it does not flap or interfere with nearby components.
Before boarding, the wearer should move their arms, bend slightly, and confirm that the harness remains secure without restricting normal movement.
Comfort During Aircraft Ascent
A properly fitted system should remain stable during boarding, seating, and movement inside the aircraft. However, users should avoid sitting directly on deployment components or placing excessive pressure against the reserve container.
The wearer should protect all handles while entering, moving through, and exiting the aircraft. Contact with seats, doorframes, other equipment, or another person could disturb a handle or closing component.
Periodic checks during the climb may help confirm that the handles remain seated and the equipment has not shifted.
Exit Stability
During exit, the harness-and-container system should remain close to the body. Proper fit reduces unwanted movement and helps the jumper maintain a stable position.
Nevertheless, equipment design cannot correct poor technique. The user must follow the planned exit procedure and maintain awareness of the aircraft, other participants, and deployment equipment.
Loose clothing, cameras, accessories, and additional equipment should not obstruct any handle or create an unnecessary snag risk.
Freefall Performance
During freefall, the container should maintain a stable profile while keeping deployment components protected.
The user must continue checking altitude, body position, traffic, and the planned sequence of the jump. The system does not make decisions or determine when deployment should occur.
Any unusual movement, exposed handle, open flap, or equipment contact should be treated seriously. The user should respond according to training and available altitude.
Main Deployment Sequence
At the planned altitude, the wearer locates the deployment handle, extracts it fully, and releases the pilot chute into clear airflow.
The pilot chute creates drag, pulls the closing pin, opens the main container, and extracts the deployment bag. The suspension lines then extend before the canopy begins inflation.
A stable body position generally supports an orderly sequence. However, deployment performance can also be influenced by packing, airspeed, pilot-chute condition, bridle routing, line organization, and canopy design.
Immediate Post-Deployment Check
After opening, the user should quickly determine whether the canopy is present, inflated, controllable, and suitable for landing.
The inspection should include:
- Canopy shape
- Line condition
- Slider position
- Steering control
- Direction of flight
- Nearby traffic
- Remaining altitude
- Landing options
If a serious problem is present, the wearer must follow trained emergency procedures without unnecessary delay.
Harness Feel Under Canopy
Once suspended, the harness should support the wearer evenly. Excessive pressure, asymmetrical loading, or unusual body position may indicate improper adjustment, fit, or canopy behavior.
The user should remain centered and avoid unnecessary movement close to other traffic. Any in-flight adjustment should be performed only when permitted by training and sufficient altitude remains.
Comfort should never take priority over traffic awareness or maintaining control.
Emergency Handle Accessibility
Emergency handles must remain accessible throughout the jump. Their location should be familiar before the equipment is used.
The wearer should rehearse the correct hand movements during ground training. However, handles should not be pulled or partially removed during routine checks.
A handle that feels loose, difficult to grip, or incorrectly positioned should be examined before the system is used again.
Cutaway-System Care
The release system depends on clean cables, correctly assembled locking components, suitable housings, and proper riser routing.
Dirt, debris, corrosion, or excessive friction may affect operation. Therefore, servicing should follow the manufacturer’s maintenance guidance.
The owner should never apply unapproved lubricants or cleaning chemicals. Any stiffness or unusual resistance should be investigated by a qualified technician.
Reserve-System Readiness
The reserve compartment should remain sealed and undisturbed between authorized inspections.
The owner should monitor the next required service date and arrange repacking before it expires. Local regulations determine how often this work must be completed.
After a reserve deployment, water landing, severe impact, or unusual event, the complete system should be inspected before it returns to service.
Landing Preparation
During descent, the pilot should plan the approach early and avoid sudden low-altitude corrections.
The harness should allow normal control movement without creating excessive pressure or restriction. However, safe landing performance depends primarily on canopy choice, training, wind conditions, traffic awareness, and pilot judgment.
The wearer should prepare for touchdown by maintaining a balanced body position and following the technique taught during training.
Post-Landing Inspection
After landing, the user should first clear the active landing area when it is safe to do so.
The canopy and lines should be gathered carefully to avoid dragging them across abrasive ground. The container, handles, risers, and deployment components should then be checked for damage or contamination.
Any hard landing, unusual opening, line entanglement, water exposure, or impact should be recorded and discussed with a qualified professional.
Packing Between Jumps
Before repacking, the user should complete a line continuity check and inspect the canopy for visible damage.
The deployment system should be arranged according to the approved procedure. The pilot chute, bridle, closing loop, pin, deployment bag, and risers all require correct placement.
Packing should not be rushed merely to meet an aircraft call. A delayed jump is preferable to using equipment that has not been checked and packed correctly.
Moisture and Water Exposure
If the equipment becomes wet, it should be removed from service until it has been examined and dried appropriately.
The system should be dried naturally in a shaded, ventilated environment. Hair dryers, heaters, ovens, and direct sunlight may damage fabric, webbing, coatings, and elastic materials.
Salt water, mud, chemicals, and contaminated water require additional professional attention because residues can continue damaging components after the surface appears dry.
Heat and Sunlight Protection
High temperatures can weaken materials and affect electronic components. Therefore, the system should not remain inside a parked vehicle, near heating equipment, or in direct sunlight for extended periods.
Ultraviolet exposure may gradually degrade fabric and webbing. When the equipment is not being used, it should be stored in a protective bag or shaded area.
The owner should avoid placing hot tools, cigarettes, fuel containers, or chemical products near the system.
Cleaning the Equipment
Routine cleaning should remain gentle. Loose dirt may be removed with a soft brush or clean cloth when approved by the manufacturer.
Bleach, solvents, household detergents, oils, and aggressive stain removers should not be applied. These substances may weaken structural fibers or damage coatings.
Serious contamination should be handled by a qualified repair facility rather than through improvised cleaning.
Hardware Inspection
Metal hardware should be checked for bending, sharp edges, corrosion, cracks, and unusual wear.
Webbing that passes through hardware may also show polishing, fraying, or discoloration. Any damaged area should be examined before further use.
Hardware should not be replaced with visually similar parts from another industry. Only approved components with the correct load rating and geometry should be installed.
Stitching and Webbing Condition
Structural stitching holds the harness and container together. Broken, loose, cut, or pulled threads may affect strength.
High-load junctions deserve careful attention, including the main lift web, leg straps, laterals, chest strap, and riser attachment areas.
Webbing should remain free from burns, chemical stains, cuts, excessive fading, and severe abrasion. Repairs must be completed using approved materials and methods.
Routine Professional Inspections
Daily user checks do not replace professional servicing. A qualified technician can identify hidden wear, incorrect assembly, aging components, and compatibility concerns.
Professional inspection becomes especially important after:
- A hard opening
- An emergency deployment
- A water landing
- A severe impact
- An equipment modification
- Long-term storage
- Purchase of a used system
- Unexplained handle movement
- Repeated deployment problems
The owner should provide complete information about what occurred.
Recordkeeping
A detailed equipment log supports responsible ownership.
Useful records include:
- Manufacturing date
- Serial number
- Reserve service dates
- Repairs and modifications
- Canopy changes
- Harness alterations
- Unusual openings
- Emergency events
- Water exposure
- Professional inspection findings
These records help future technicians understand the system’s history and may improve resale transparency.
Buying a Used System
A used package should never be purchased based only on photographs or cosmetic appearance.
The buyer should request complete component details, serial numbers, manufacturing dates, jump estimates, repair history, reserve records, canopy specifications, and information about any electronic equipment.
An independent inspection should confirm structural condition, harness fit, canopy compatibility, and remaining serviceability before payment or use.
Long-Term Ownership Responsibilities
The owner remains responsible for maintaining the system, arranging professional inspections, following service notices, and using compatible components.
Changes in body weight, canopy size, discipline, experience, or intended use may require the system to be reassessed.
Reliable operation depends on accurate fitting, careful packing, disciplined checks, professional maintenance, suitable components, and current training. The system supports the jumper, but it cannot replace knowledge, judgment, or responsible decision-making.
Be the first to review “Sun Path Javelin Odyssey Full Rig Package”
Related products

Reviews
There are no reviews yet.